 105 minutes
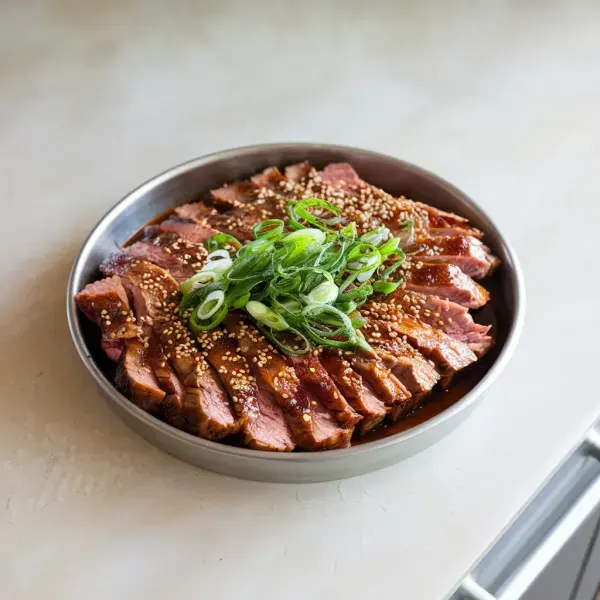
A savory and flavorful Korean-style marinated rib-eye served with tangy pickled daikon.


cups
tablespoons
teaspoons
Daikon Radish, peeled and cut into 1.5-inch-long matchsticks
0 lb
Scallions, white and light green parts only, minced
each
Doenjang
cups
tablespoons
tablespoons
teaspoons
teaspoons
Garlic Clove, minced
each
Rib-eye steak, cut crosswise into 1.5-inch-wide pieces and trimmed
0 lb
tablespoons
teaspoons
Onion, chopped
cups
cups
tablespoons
Garlic Clove, peeled
each
tablespoons
teaspoons
teaspoons
Scallions, dark green parts only, cut into 1.5-inch pieces
each
1. Make Pickled Daikon
In a medium bowl, whisk together the rice vinegar, 2 tablespoons sugar, and 1.5 teaspoons table salt until the sugar and salt have dissolved and the mixture is clear. Add the daikon radish matchsticks to the bowl, ensuring they are fully submerged in the vinegar mixture. Cover the bowl and refrigerate for at least 30 minutes, or up to 24 hours, to allow the daikon to pickle and absorb the flavors.
2. Prepare Sauce
In a small bowl, combine the minced white and light green parts of the scallions, doenjang, gochujang, 1 tablespoon water, 2 teaspoons sugar, toasted sesame oil, and minced garlic. Stir the mixture until it is smooth and well-blended. Cover the bowl and set it aside. This sauce can be made up to three days in advance and refrigerated to allow the flavors to meld.
3. Freeze and Slice Beef
Place the rib-eye steak pieces in the freezer for 35 to 40 minutes. This will firm up the meat, making it easier to slice thinly. Once the beef is firm to the touch, use a sharp knife to shave it into very thin slices. This ensures that the beef will cook quickly and evenly.
4. Tenderize Beef
In a medium bowl, mix together 1 tablespoon water and 0.25 teaspoon baking soda, then add the shaved beef to this mixture and let it sit for about 5 minutes. The baking soda helps to tenderize the beef.
5. Prepare Marinade
In a food processor, combine the chopped onion, 0.25 cup sugar, soy sauce, peeled garlic cloves, toasted sesame oil, and pepper. Process the mixture for about 30 seconds or until it reaches a smooth consistency.
6. Marinate Beef
Transfer the beef to a medium bowl and pour the processed marinade mixture over it, ensuring the beef is evenly coated. Let the beef marinate while you prepare the cooking area.
7. Cook Beef
Heat the vegetable oil in a 12-inch nonstick skillet over medium-high heat until the oil is shimmering. Add the marinated beef mixture to the skillet and cook it for 1 minute without stirring to let the beef brown. Then, stir the beef and continue cooking for an additional 3 to 4 minutes, or until the beef is no longer pink.
8. Finish and Serve
Add the dark green parts of the scallions to the skillet and cook for another 30 seconds to infuse the dish with their fragrance. Transfer the cooked beef and scallions to a platter and serve with the pickled daikon and the prepared chile sauce.
Create a satisfying meal with bulgogi on steamed rice, vegetables, and a fried egg.
Cook the meat on a grill or barbecue for added smokiness.
Serve in tortillas with slaw, kimchi, sesame oil, and Sriracha for a Korean-Mexican fusion.
Replace rib-eye with thinly sliced chicken for a quick-cooking alternative that readily absorbs the marinade.
Add gochujang, fresh chili peppers, hot pepper flakes, or smoky chipotle powder for different levels of spiciness.
Cook bulgogi quickly over high heat to sear the outside and keep the inside juicy, using a hot grill, cast-iron skillet, or wok.
Choose rib-eye that is not too thick, ideally about 1/8-inch thick, to allow the marinade to penetrate effectively and for quick cooking.
Use a grated Asian pear in your marinade for sweetness and to tenderize the meat. Marinate for at least an hour, or overnight for best results.
Maintain a consistent high heat when cooking to achieve the signature charred edges without overcooking.
Ensure precise measurements of soy sauce, sugar, and seasonings in the marinade, and adjust to taste before adding the meat.


Comments (0)