 110 minutes
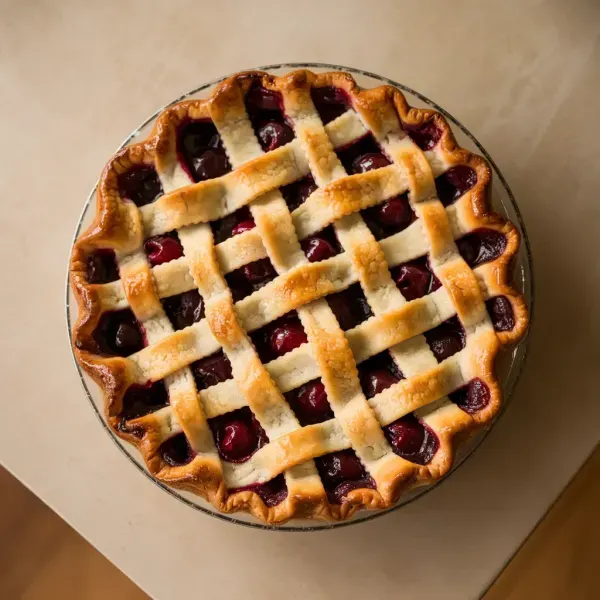
This delightful cherry pie brings together a buttery crust and a luscious, sweet-tart cherry filling. Perfect for both experienced bakers and first-timers.
cups
teaspoons
cups
Unsalted Butter, chilled and diced
cups
tablespoons
Fresh Or Frozen Cherries, pitted
cups
tablespoons
tablespoons
teaspoons
tablespoons
Egg, beaten
each
1. Prepare the Dough
Begin by combining the flour, salt, and sugar in a large bowl. Add the chilled, diced butter to the mixture. Using your fingertips or a pastry cutter, blend the butter into the flour mixture until it resembles coarse crumbs. Gradually add 6 to 8 tablespoons of ice water, mixing gently until the dough starts to come together. Form the dough into two discs, wrap each in plastic wrap, and refrigerate for at least 30 minutes.
2. Preheat the Oven
While the dough is chilling, preheat your oven to 425°F (220°C). This high temperature is crucial for baking the pie to golden perfection.
3. Roll Out the Dough and Prepare the Pie Plate
Once chilled, roll out one disc of dough on a lightly floured surface. Ensure the dough is large enough to slightly overhang the edges of a 9-inch pie plate. Gently fit the rolled dough into the pie plate, trimming any excess.
4. Prepare the Cherry Filling
In a large bowl, combine the pitted cherries, sugar, cornstarch, lemon juice, and vanilla extract. Stir the mixture until the cherries are evenly coated, then pour the filling into the prepared pie crust. Dot the top of the filling with small pieces of butter to add richness.
5. Top the Pie and Apply Egg Wash
Roll out the second disc of dough and carefully place it over the cherry filling. Seal the edges by pressing them together and trimming any excess dough. Use a sharp knife to cut slits in the top crust to allow steam to escape while baking. Brush the top crust with the beaten egg to give it a beautiful golden hue.
6. Bake the Pie
Place the pie in the preheated oven and bake for 45 to 50 minutes, until the crust is golden brown and the filling is bubbly. Keep an eye on the pie, as ovens can vary.
7. Cool Before Serving
Allow the pie to cool on a cooling rack. This cooling time allows the filling to set, making it easier to slice and serve. Once cooled, your cherry pie is ready to be enjoyed!


Comments (0)