 180 minutes
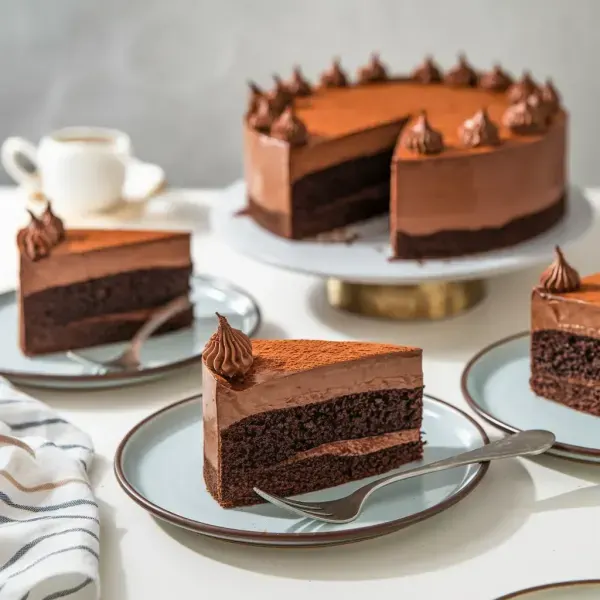
A rich and indulgent chocolate cake layered with a silky chocolate mousse, perfect for any special occasion.


Unsalted Butter, cut into chunks
cups
Unsweetened Cocoa Powder
cups
tablespoons
teaspoons
teaspoons
Semisweet Chocolate, coarsely chopped
0 oz
cups
Large Eggs, chilled
each
cups
Semisweet Chocolate, finely chopped
0 oz
Unsweetened Cocoa Powder
tablespoons
1. Preheat Oven and Prepare the Pan
Center a rack in your oven and preheat it to 325 degrees Fahrenheit. Grease a 9-inch cake pan with butter, line the bottom with parchment paper, and butter the paper as well.
2. Mix Dry Ingredients
In a medium bowl, sift together 1/3 cup of cocoa powder, 1.5 tablespoons of cornstarch, 1/4 teaspoon of baking powder, and 1/4 teaspoon of fine sea salt. This ensures that all the dry ingredients are well combined and any lumps are removed.
3. Melt Butter and Chocolate
In a large heatproof bowl set over a saucepan of simmering water, melt 1/2 cup of butter. Scatter the coarsely chopped 5 ounces of chocolate on top, stirring occasionally until the mixture is smooth and glossy. This gentle melting method prevents scorching and ensures an even consistency.
4. Incorporate Sugar and Eggs
Remove the bowl from the heat and stir in 1/2 cup of sugar until fully blended. Add the 3 chilled eggs one at a time, beating for about a minute after the last egg until the mixture looks like smooth pudding. This step is crucial for creating a light texture by incorporating air into the batter.
5. Combine and Bake
Stir the sifted dry ingredients into the chocolate mixture until just combined. Pour the batter into the prepared cake pan and give it a gentle rap on the counter to release any air bubbles. Bake for 18-20 minutes, or until a tester inserted into the center comes out clean.
6. Cool the Cake
Transfer the cake to a cooling rack and let it cool for 5 minutes in the pan. Carefully unmold the cake, peel off the parchment paper, invert it, and let it cool completely to room temperature on the rack.
7. Prepare the Ganache
Pour 1.25 cups of the heavy cream into a small saucepan, setting aside the remaining cream in the refrigerator. Heat the cream over medium heat until it just begins to simmer. Remove from heat and stir in the finely chopped 6 ounces of chocolate until smooth and fully incorporated. Transfer the ganache to a bowl and refrigerate, stirring every 10 minutes, until it thickens to a spreadable consistency.
8. Set Up the Cake for the Mousse Layer
Cut two pieces of parchment or foil, each measuring 3 by 16 inches. Crisscross these strips in the cake pan, leaving an overhang to help lift the cake out later. Return the cooled cake to the pan.
9. Whip Cream and Fold into Ganache
Whip the remaining 1/2 cup of heavy cream to medium peaks. Whisk the chilled ganache until it becomes spreadable, then gently fold in the whipped cream until well combined. This creates a light and airy mousse that complements the dense cake.
10. Chill and Serve
Spread the ganache mousse evenly over the cake, smoothing the top. Refrigerate for at least 2 hours to set. Before serving, dust the top with 3 tablespoons of cocoa powder using a fine-mesh strainer. Run a knife along the sides to loosen the cake, then use the parchment or foil overhang to lift it out. Cut the cake with a knife dipped in hot water for clean slices.
After baking the base, add a layer of chocolate mousse for a decadent multi-textured dessert.
Pour the batter into ramekins and underbake slightly for a gooey, molten center.
Enhance the chocolate flavor by adding a shot of strong espresso or 1-2 teaspoons of instant coffee granules to the batter. Coffee is a well-known enhancer for chocolate, deepening its complexity without overwhelming the cake.
Mix in a shot of espresso or a tablespoon of instant coffee powder to enhance the chocolate flavor with a coffee undertone.
Swirl through some salted caramel before baking. The salty sweetness will contrast beautifully with the dense chocolate cake.


Comments (0)