 65 minutes
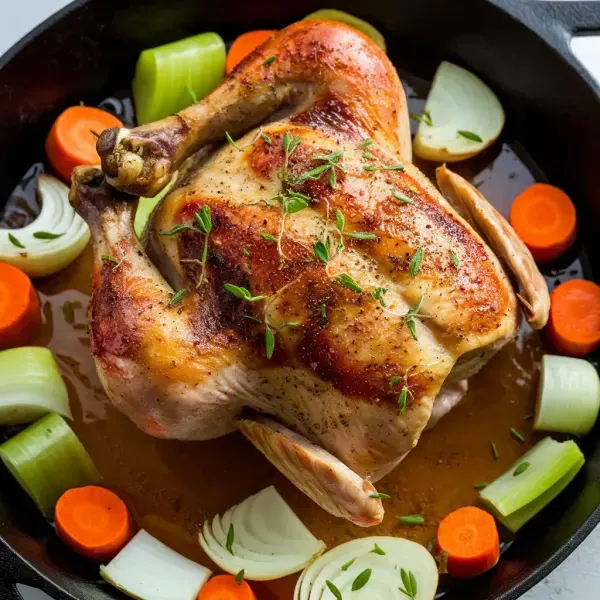
A flavorful and crispy roast chicken served with a rich homemade jus, perfect for any occasion.
Large Chicken
0 lb
tablespoons
tablespoons
Black Pepper, freshly ground
teaspoons
Baking Powder, optional
teaspoons
Chopped Fresh Herbs, optional
teaspoons
Medium Onion, roughly chopped
cups
Medium Carrot, peeled and roughly chopped
cups
Medium Rib Celery, roughly chopped
cups
Bay Leaf
each
cups
cups
teaspoons
tablespoons
teaspoons
1. Preheat the Oven
Start by placing your oven rack in the upper-middle position and preheating the oven to 450°F (232°C). This high temperature is key to achieving that coveted crispy skin.
2. Prepare the Chicken
Using sharp kitchen shears, remove the backbone from the chicken and cut the spine into 1-inch pieces. This process, known as spatchcocking, will help the chicken cook more quickly and evenly. Place the chicken skin-side up on a cutting board and apply firm pressure to the breastbone to flatten it.
3. Position the Chicken
Transfer the flattened chicken to a wire rack set in a foil-lined rimmed baking sheet. If you’re using fresh herbs, now is the time to gently separate the skin from the breast and thigh meat and push the herbs underneath. Be careful not to tear the skin while doing this.
4. Season the Chicken
In a small bowl, combine 1 tablespoon (15g) kosher salt, 1/2 teaspoon freshly ground black pepper, and 1 teaspoon (5g) baking powder if you’re using it. The baking powder helps to further crisp the skin. Sprinkle this mixture all over the chicken. Drizzle 1 tablespoon (15ml) of oil over the chicken skin and rub it to distribute evenly.
5. Roast the Chicken
Place the chicken in the preheated oven and roast until the thickest part of the breast close to the bone registers 150°F (66°C) and the thigh joint reaches at least 175°F (80°C). This should take about 45 minutes. An instant-read thermometer is your best tool here to ensure the chicken is cooked perfectly.
6. Prepare the Jus
While the chicken is roasting, heat the remaining 1 tablespoon (15ml) of oil in a small saucepan over medium heat. Add the chicken backbone pieces and cook until browned, about 3 minutes. Add the roughly chopped onion, carrot, and celery and cook for another 3 minutes until they begin to soften. Add the bay leaf, 1 cup (240ml) dry vermouth or sherry, and 1 cup (240ml) water, using a wooden spoon to scrape up any browned bits from the bottom of the pan. Reduce the heat and let it simmer for 20 minutes.
7. Reduce the Jus
After simmering, strain the solids from the liquid and return the liquid to the pan. Boil until reduced to about 1/3 cup, which should take around 7 minutes. Whisk in 1 teaspoon (5ml) soy sauce, 3 tablespoons (45g) unsalted butter, and 2 teaspoons (10ml) lemon juice. Season to taste with salt and pepper.
8. Rest the Chicken
Once the chicken is done roasting, remove it from the oven and transfer it to a cutting board. Tent it loosely with foil and let it rest for about 5 minutes to allow the juices to redistribute.
9. Serve
Carve the chicken and serve it hot, accompanied by the rich, flavorful jus you've prepared. Enjoy your perfectly roasted, crispy-skinned chicken with a homemade jus that elevates every bite.
Apply the same technique to duck breast for a richer flavor. Render the fat on the skin side first, then finish in the oven. Use red wine for deglazing and add cherries or berries to the jus for a fruity note.
Use apple cider to deglaze the pan, and add in some sautéed apples for a fall-inspired variation.
Deglaze the pan with a good quality white wine before adding the chicken stock for the jus.
Sauté mushrooms in the pan before making the jus and stir in a bit of soy sauce or miso paste.
Change up the jus by using different deglazing liquids like balsamic vinegar, sherry, or even stout beer. Incorporate ingredients such as mushrooms, shallots, or Dijon mustard to the jus for unique twists.
Prepare the jus in the same skillet while the chicken rests to capture all the delicious fond left behind. Deglaze the pan with white wine or chicken stock, scrape up the fond, and simmer until reduced. Strain the jus before serving.
Start with a high-quality, air-chilled chicken. The air-chilling process helps the skin dry out, which is crucial for achieving that crispy exterior. A smaller bird, around 3 to 4 pounds, will cook more evenly and provide the best results.
Let the chicken rest for at least 10 minutes before carving to allow the juices to redistribute, ensuring a moist, flavorful bird. The internal temperature should reach 165°F or 74°C in the thickest part of the thigh.
Roast the chicken in a preheated 450°F (232°C) oven to ensure a crispy skin and help the chicken cook quickly and evenly.
For an extra flavorful and crispy skin, dry brine your chicken by rubbing it all over with kosher salt and letting it sit uncovered in the refrigerator for at least 12 hours to season the meat deeply and help the skin dry out further.

Comments (0)