 140 minutes
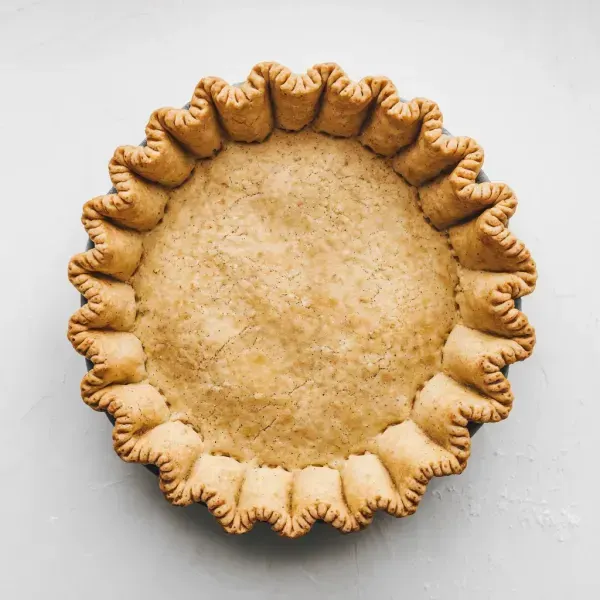
A perfectly flaky and buttery pie crust made with precise measurements and careful technique.
All Purpose Flour, divided
0 oz
tablespoons
teaspoons
Unsalted Butter, cut into 1/4-inch pats
0 oz
0 oz
1. Combine Dry Ingredients
In a food processor, combine 2/3 of the flour, the sugar, and the salt, and pulse a few times until the mixture looks uniform. This ensures that the sugar and salt are evenly distributed throughout the flour.
2. Add Butter
Spread the butter pats evenly over the flour mixture and pulse about 25 times with short bursts. The goal here is to distribute the butter evenly, which will give your crust a wonderfully flaky texture. You’ll know it's right when the dough starts to clump together and you can see small bits of butter throughout.
3. Add Remaining Flour
Sprinkle the remaining flour over the dough and pulse about 5 more times. This step helps to prevent overworking the dough, which can make it tough. The dough should just start to break up again at this point.
4. Incorporate Water
Transfer the dough mixture to a large bowl and sprinkle the cold water over it. Using a rubber spatula, fold the water into the dough until it begins to come together. The cold water is crucial because it helps keep the butter solid, ensuring a flaky crust. The dough should form a ball without being too wet.
5. Chill the Dough
Divide the dough in half and form each half into a disk. Wrap each disk in plastic wrap and refrigerate for at least 2 hours. Chilling the dough relaxes the gluten and keeps the butter firm, which is essential for a tender and flaky crust.
6. Roll Out the Dough
On a well-floured surface, roll one of the dough disks into a circle using a tapered rolling pin. Aim for a uniform thickness that will allow the dough to overhang your pie plate by 1 to 2 inches. Rolling evenly ensures your crust bakes uniformly.
7. Fit Dough Into Pie Plate
Carefully lift the rolled dough and fit it into your pie plate, gently pressing it into the edges. Trim the overhanging dough with scissors, leaving about an inch around the edge.
8. Finish the Edges
Tuck the edges under themselves and flute them using your fingers or the back of a fork for a decorative finish.


Comments (0)