 10 minutes
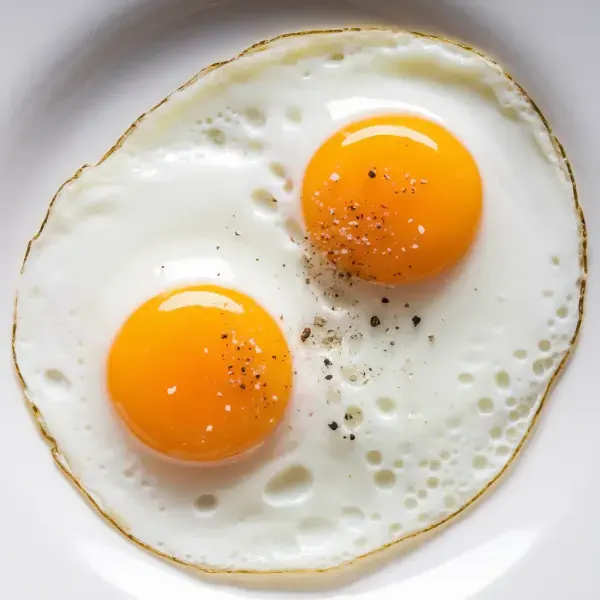
Perfectly cooked sunny-side up eggs with a silky texture, made with just a few simple steps.
each
Unsalted Butter, chilled
tablespoons
to taste
to taste
1. Preheat Skillet
Begin by preheating a 12-inch nonstick skillet over low heat for about 5 minutes. This step is crucial because a properly preheated skillet ensures even cooking and prevents the eggs from sticking.
2. Crack Eggs into Teacups
While the skillet is warming up, crack two eggs into separate teacups or small bowls. This makes it easier to pour the eggs into the skillet without breaking the yolks. Repeat with the remaining two eggs in another set of teacups.
3. Melt Butter
Once the skillet is warm to the touch, add 1 tablespoon of chilled unsalted butter. Let the butter melt and spread across the surface. The butter not only adds flavor but also creates a perfect non-stick surface for the eggs.
4. Pour Eggs into Skillet
Gently pour the eggs from the teacups into the skillet. Pouring them quickly but carefully ensures the eggs spread evenly across the skillet. Immediately season the eggs with a pinch of salt and pepper.
5. Cook Eggs
Cover the skillet with a lid and let the eggs cook for about 2 to 3 minutes. This technique allows the eggs to cook evenly without the need for flipping. You'll know they're done when the whites are firm, and the yolks are cooked to your desired doneness.
6. Serve Eggs
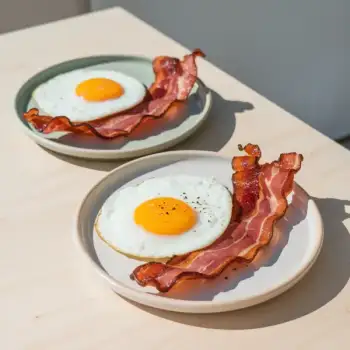
Once the eggs are cooked to your liking, remove the lid and check them. If they need a bit more time, let them cook uncovered for a few more seconds. Finally, gently slide the sunny-side up eggs onto a plate and serve immediately. Enjoy the silky texture and rich flavor of perfectly cooked eggs, made with just a few simple steps.
Cook the eggs on low heat to prevent browning and achieve a tender white and runny yolk.
Opt for the freshest free-range or organic eggs for firmer whites and more robust yolks.
Use a lid or steam-basting method to gently set the whites over the yolk without flipping the egg.
Use a quality non-stick skillet to ensure a silky texture without sticking.
Serve sunny-side up eggs straight from the pan to avoid overcooking.


Comments (0)