 55 minutes
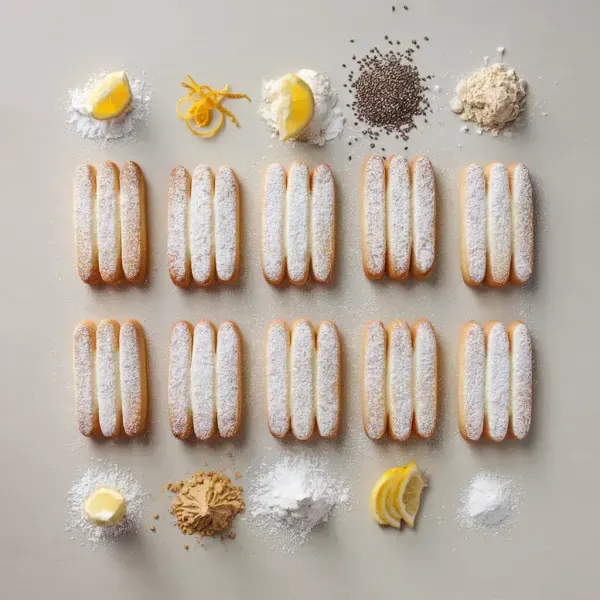
Crisp, light ladyfinger cookies perfect for enjoying on their own or as a delightful companion to your favorite desserts.
each
0 oz
teaspoons
Lemon Zest, freshly grated
tablespoons
0 oz
Powdered Sugar
to taste
1. Getting Ready
Begin by adjusting your oven rack to the middle position and preheating the oven to 350°F (175°C). Line two sheet pans with parchment paper. Prepare a piping bag fitted with a 1/2-inch round tip by placing it inside a tall drinking glass to keep it upright and ready for filling. Fill a saucier or a small pot with water and bring it to a simmer.
2. For the Ladyfingers
In the bowl of a stand mixer, combine the eggs, sugar, and salt. Stir these ingredients together, then place the bowl over the steaming pot of water. Warm the mixture, stirring constantly until it reaches 160°F, which should take about 5 minutes. This step ensures the mixture is safe to consume and ready for whipping.
3. Whip the Eggs
Once the mixture is warmed, transfer the bowl to the stand mixer fitted with a whisk attachment. Whip the mixture on high speed for 5 to 10 minutes until it becomes foamy and thick, almost like soft serve ice cream. This whipping process incorporates air, giving the ladyfingers their light, crisp texture.
4. Add Dry Ingredients
Gently fold in the lemon zest, if using. Sift the flour and cornstarch over the egg mixture, then fold these dry ingredients in carefully with a flexible spatula. Mix just until combined, taking care not to deflate the airy batter.
5. Pipe the Batter
Transfer the batter to the prepared piping bag. Pipe the batter onto the parchment-lined sheet pans, holding the bag at a 45° angle. Each ladyfinger should be about 4 inches long. Stop squeezing before you reach the end of each cookie and lift the bag straight up to avoid creating a tail.
6. Bake the First Tray
Dust the piped ladyfingers generously with powdered sugar using a fine-mesh sieve. Bake the first tray for about 12 minutes, or until the cookies are firm and lightly golden.
7. Bake the Second Tray
Repeat the dusting and baking process with the second tray of ladyfingers, ensuring they are also baked for about 12 minutes until crisp and golden.
8. Cool and Store
Allow the ladyfingers to cool completely on the sheet pans. Once cooled, transfer them to an airtight container. These cookies can be stored at room temperature for up to three weeks, ready to enjoy whenever you like.
The classic Italian dessert relies on ladyfingers as a key ingredient. Soak your homemade ladyfingers in a coffee and liqueur mixture, then layer with a mascarpone cheese mixture.
After baking and cooling the cookies, dip one end into melted chocolate. You could use dark, milk, or white chocolate and even add a sprinkle of nuts or coconut flakes.
After baking, dip the ends of the ladyfingers in melted chocolate or drizzle them with a glaze flavored with lemon juice or coffee.
Add the zest of a lemon, lime, or orange to the egg yolk mixture for a citrusy twist. This would pair beautifully with desserts like lemon mousse or an orange-infused tiramisu.
Add the zest of a lemon, lime, or orange to the batter for a bright, citrusy note. This can be particularly refreshing and pairs well with summer desserts or as an accompaniment to tea.


Comments (0)